


Quite awhile ago I took my daughter to have her picture taken at a local Children's photography shop. After we got some darling photos taken we went to a computer where I was shown the pictures and all the options available. One of the things I noticed was how they could enhance the photos with a myriad of different digital frames/borders. Of course each border added an additional cost, and it all seemed to add up so quickly I was flabbergasted.
The lady at the store had to step away for a moment so I took over the mouse and experimented for a few minutes. I found it was really fun to select different borders, change the orientation of the photo and add text. When she came back I was disappointed to have to give up the mouse.
After learning how to use Paint Shop Pro I found I could add pre-made or custom digital borders and frames to my photos. One thing to remember though is that you must own the rights to any photos you want to modify. If you took the picture or bought the negatives from the photographer then you can work with the photo and make as many copies as you like. However, if you bought one print you can't legally scan it, make adjustments and make multiple prints without the permission of the photographer. Many people think that if they pay for a print that they own the photo, but legally you don't so please remember all the photographers who make a living by taking pictures and be considerate of their copyright.
Before starting the steps to this tutorial, I want to clarify the definition of a border and a picture frame in Paint Shop Pro. A border is a single color outline, like the 2 pixel wide black outline around the image below. The width of each of the sides, top and bottom can be set symmetrically or individually. Adding a border increases the dimensions of the original image by expanding the canvas size. A PSP picture frame is a custom graphic with a transparent space in the middle of the frame. This space is left open for the original picture to be displayed through the new frame layer added above the original photo. The picture frame below is the white matting surrounding the photo below.
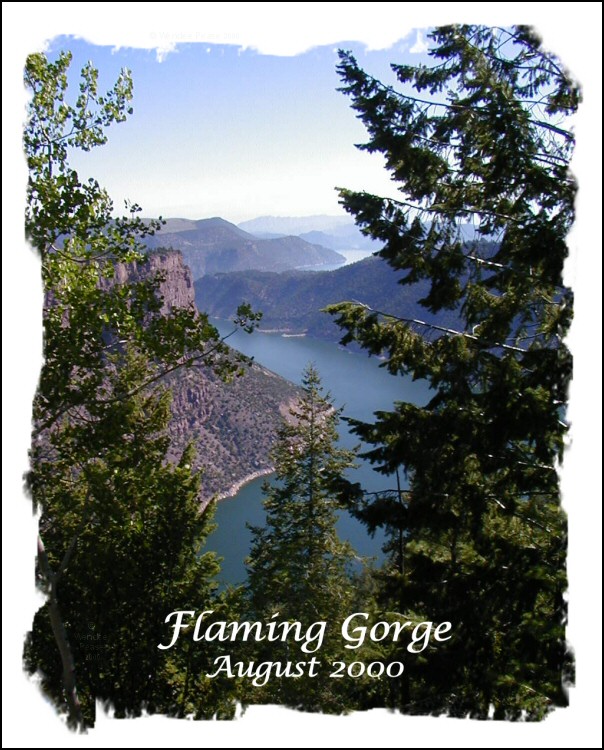
Picture frames come in an endless number of different shapes, sizes and colors. My favorite frames are typically the ones with a torn paper edge look like the one above, or with digitally painted edges. After scrolling through your choices you may find something completely different appeals to you. PSP comes with quite a few frames by default, but you can also add more that you purchase, make on your own, or find listed as free on the web. (Hint: You'll find some great free frames at www.Corel.com, click on Community on the bar across the top, and then click on Paint Shop Frames on the side bar, and download away.) Corel also has their Xtras - Creative Edition series you can purchase that include many different frames and other goodies.
Open the photo you'd like to add a frame to. If you don't have a photo you can use a blank copy of the photo I used above by clicking here and saving the file to your hard drive. Now, save the file as a PSP file type. This way when you save it again after making changes you won't change your original copy and you'll have a version with multiple layers that won't be flattened into a single background layer as would happen with a JPG file. Besides it's always good to have a back-up copy, and preserve your original.
To apply the digital picture frame, choose the Image menu, and select Picture Frame. In the dialog box click on the triangle shaped button indicated in the image below to select from the available frames. Once you've found one you like, click on it. Then, to fine tune the settings experiment with the Inside/Outside of the image options. You can also Flip the frame (turn it upside down), Mirror the frame (twirl the frame reversing the sides), and Rotate the frame 90 degrees clockwise.
![]()
Some frames come with an alpha channel defining transparent areas that are usually outside the frame. To experiment with some custom frames I made click here to download them, and then save them into your PSP Picture Frames folder.
When you apply this type of frame to a background layer and place the frame outside the image then all or part of the transparent portions will be filled with the current background color. This happens because background layers don't support transparency. To solve the problem uncheck Keep Transparent and select a color to fill the previously transparent areas. I usually use white.
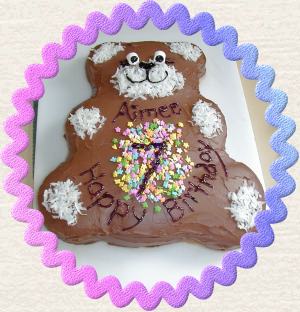
If you need the areas outside the frame to appear transparent, as in the image above, then select Keep Transparent. Once that is done and the frame has been applied, select the Picture Frame layer. Then select the Magic Wand tool (type S to choose the Selection tool, then click on the triangle pointing down by the Selection tool and choose the last tool on the drop down menu). Adjust the settings to match those below.

Click on each of the areas outside the frame until all the areas that are supposed to be transparent are selected. Choose the Selections menu and choose Modify, Expand. Adjust the number of pixels to select several pixels into the frame you just added and choose ok.
Hint: To preview the changes on your image using the current settings click on the button that looks like an eye (proof). To always preview the changes on your image, click on the button with the eye and the pen (auto proof). In explanation, when you click on the proof button it works once. So if you adjust the settings within the dialog box again, to preview the changes again you'd have to click on the proof button again. When you use the Auto proof button each time you adjust the settings the preview is automatically updated.
Duplicate the background layer using the fifth button on the Layer Palette, and hide the background layer. Make sure the new copy of the background layer is selected on the Layer Palette. With the selection marque you made in the previous steps visible, hit the delete button on your keyboard. If your selection was large enough then your frame will have transparent edges surrounding it with no part of your image outside the transparent display window.
One thing to keep in mind is that while you can have a 16 million color PSP file with a transparent background, if you choose to save the file as a different type your options are a bit more limited. A PNG may be your best option. If you're planning on displaying your image in Internet Explorer then you may need to go with a GIF which will force you to reduce your color depth to 256. If you want to make your image appear transparent, but put it on a background, like I did with the teddy bear cake image above, then a JPG will work fine.
If you enjoyed this tutorial be sure to share it with a friend.