When an image is resized and resample is checked, the original pixels in the image are changed by adding or subtracting pixels. This is done to make an image larger or smaller, which also increases or decreases the file size.
In the example below Figure 1 is 101 pixels wide by 101 pixels tall. The letter A was typed in a 72 point font using the BernhardMod BT font face. Figure 2 was created by resampling Figure 1 to 75% of it's original size which resulted in an image 76 pixels wide and 76 pixels tall. Figure 3 was created by resampling Figure 1 to 21% of it's original size which resulted in an image 21 pixels wide by 21 pixels tall.
Below I have displayed all three images at their default resolution of 72 ppi. Notice how Figure 2 has a slight blur. Figure 3 is quite blurry and upon close examination pixelation is even visible in various places.
Figure 1 |
Figure 2 |
Figure 3 |
Each of the images below is displayed at double their normal size to emphasize the decrease of image sharpness. While you can still tell that all three images display the letter A, Figure 1a is smoother than the other two images with extreme pixelation visible in Figure 3a.
Figure 1a |
Figure 2a |
Figure 3a |
In addition to resampling Figure 1 to create smaller sizes, I also created a 76 pixel square image and a 21 pixel square image to approximate the resampled images. Figure 4 below is 76 pixels square and I used a 54 point font. Figure 5 below is 21 pixels square and I used a 16 point font. I resampled Figure 1 without the grid to create Figures 2b and 3b.
Notice how since Figures 4 and 5 were created in the size in which they were saved they are sharper than their resampled counterparts. However, Figure 4 doesn't have the curved serrifs that Figure 2b maintained through the resampling.
Figure 2b |
Figure 4 |
|
|
|
While resampling will increase or decrease the size of an image, typically it is best to create images in the size in which they are intended to be used. If you need to resize, it is usually best to only increase the image 25% by resampling. I have had better results when I start with a larger image and resample down to the needed size. I usually prefer not to resample down more than 50%. It is also a good rule of thumb to only resample an image once. If you find your results aren't what you want, undo, adjust the settings and try again.
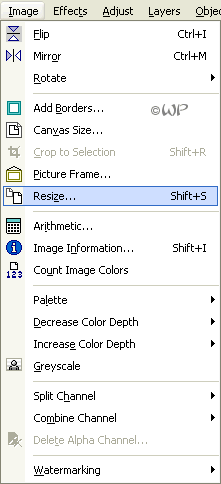
Now that you have an idea of what resampling does you probably would like to know how to do it. The resampling option is found in the Resize dialoge box (shift + s) located on the Image menu. To resample and not just resize an image you must check the box marked Resample using as shown in the example below. I almost always select the Lock aspect ratio 1 to 1 and Resize all layers check boxes.
 |
 |
In resampling Figure 1 both the Smart Size or Weighted Average option worked equally well. The Bicubic, Bilinear, and Pixel Resize options didn't render the images well. There is a great description in Paint Shop Pro Help of what each of the types of resampling does to add or remove pixels, and I have copied it here for your reference.
I also created a page that displays enlarged resampled versions of Figure 1 that you can review if you'd like by clicking here.
Using resampling in resizing an image is a powerful feature and once you're more familiar with using the tool you'll have improved results. After you've gotten used to adjusting the settings you may want to try using the Unsharp Mask to enhance your results after resampling.